-

About Flexfilm 2
-

Getting Started 10
-
Core Fundamentals 10
-
-

Orders & Support 83
-
Shipping 10
-
Dealer Rewards 13
-
Ordering & Account 7
-
Pre-Cut Patterns 2
-
General 9
-
Warranty 6
-
Billing & Tax 3
-
Route Package Protection 2
-
Returns & Refunds 2
-
Shop Pay 2
-
Training 1
-
Dealer & Installer Program 4
-
Selling & Quoting 9
-
Marketing & Growth 8
-
Business Operations 5
-
-

Installation Resources 19
-
Architectural 4
-
Automotive 5
-
General 10
-
-

Architectural Window Film 54
-
Safety & Compatibility 17
-
Ownership 2
-
Fundamentals 16
-
Buying Guides 4
-
Performance & Privacy 6
-
Product Guides 9
-
-

Automotive Window Film 40
-
Installation & Ownership 18
-
Product Guides 11
-
Legal & Compliance 3
-
Buying Guides 8
-
-

Tools 10
-
Cutting & Prep 3
-
Application 3
-
Measurement & Layout 2
-
Specialty 2
-
-

Plotters 8
-
Ownership 6
-
Buying Guides 2
-
-

FlexCut Software 25
-
Account & Licensing 5
-
Getting Started 10
-
Troubleshooting 2
-
Using FlexCut 8
-
-

Paint Protection Film (PPF) 10
-
Ownership 3
-
Fundamentals 4
-
Product Guides 3
-
-

Surface Coatings 13
-
Product Guides 7
-
Fundamentals 3
-
Ownership 3
-
User Patterns Organizer


User Patterns Organizer
The Patterns Organizer allows you to modify patterns from the database and save them in a folder of your choice.
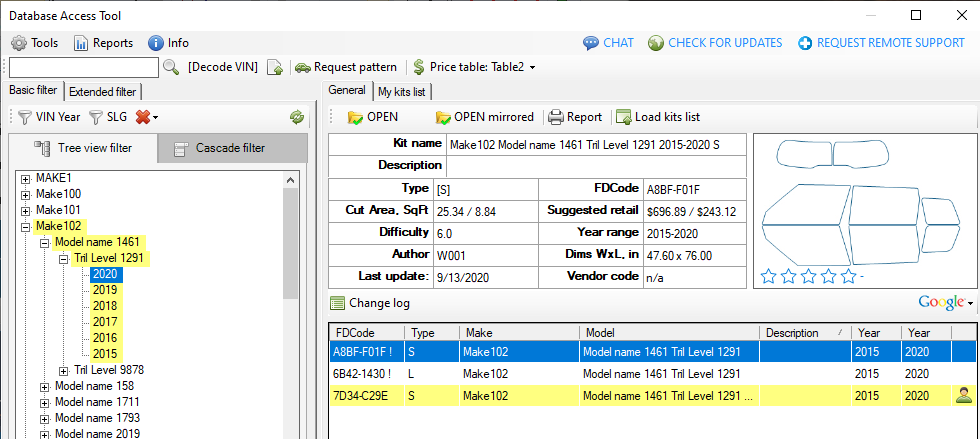
To make your custom patterns easier to identify, you can use the Colors by Authors feature to highlight them in the Tree View filter.
Set Up Colors by Authors
In the Database Access Tool, go to:
Tools > Settings
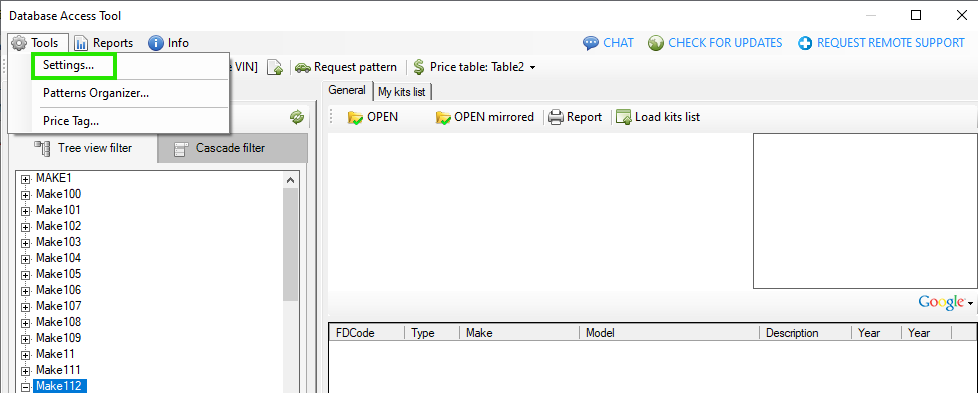
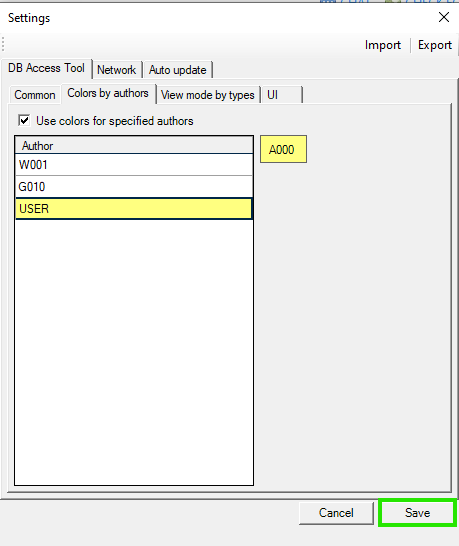
In the Settings window, open the Colors by Authors tab.
By default, your author name is USER. To make sure your custom patterns are highlighted correctly, assign a color to this author.
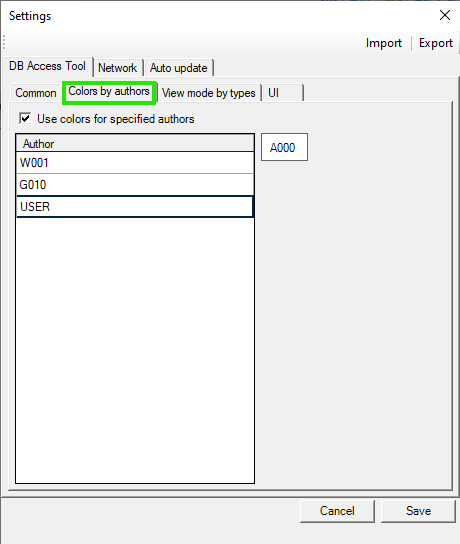
- Right-click the USER field.
- Choose the highlighting option you want to use.
For example, select “Select Back Color” to assign a background color to patterns associated with the USER author.
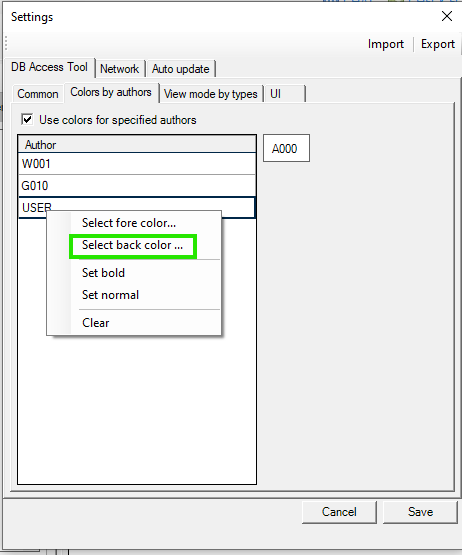
Choose your preferred background color, then click “OK”.
The selected author will now be highlighted using the color you selected.
Make sure “Use colors for specified authors” is checked, then click “Save” to apply the changes.
Create a Modified Pattern
Once Colors by Authors is configured, patterns you modify can be highlighted in the Tree View, making them easier to identify later.
- Open the pattern you want to modify.
- Make the desired changes to the pattern.
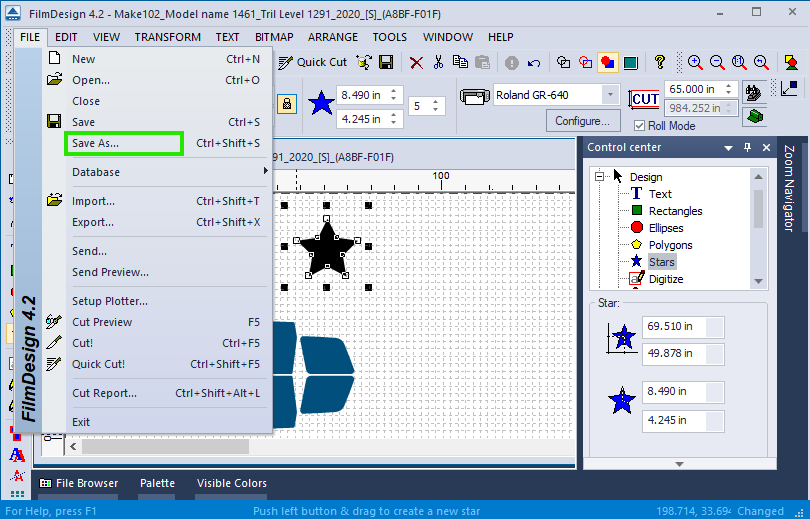
In the example shown in the source document, a star is added to the pattern to make the modification easy to see. You can make any changes needed for your application.
Once you are satisfied with the modifications, go to:
File > Save As
Save Your Custom Patterns
We recommend creating a dedicated folder on your computer to store all of your custom patterns.
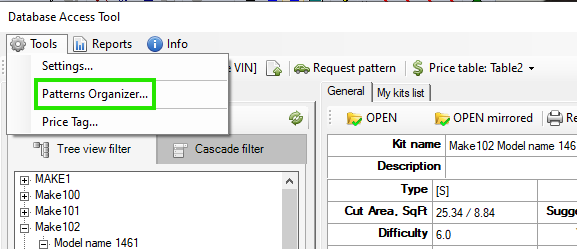
After saving the modified pattern, return to the Database Access Tool and go to:
Tools > Patterns Organizer
Add Your Custom Pattern Folder
In Patterns Organizer:
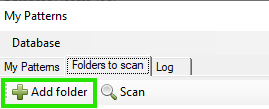
- Open the Folders to Scan tab.
- Click “Add Folder.”
- Select the folder where your custom patterns are saved.
After adding the folder, click “Scan.”

The software will inspect the selected folder and import the saved pattern files into Patterns Organizer.
Scan Your Folders Later
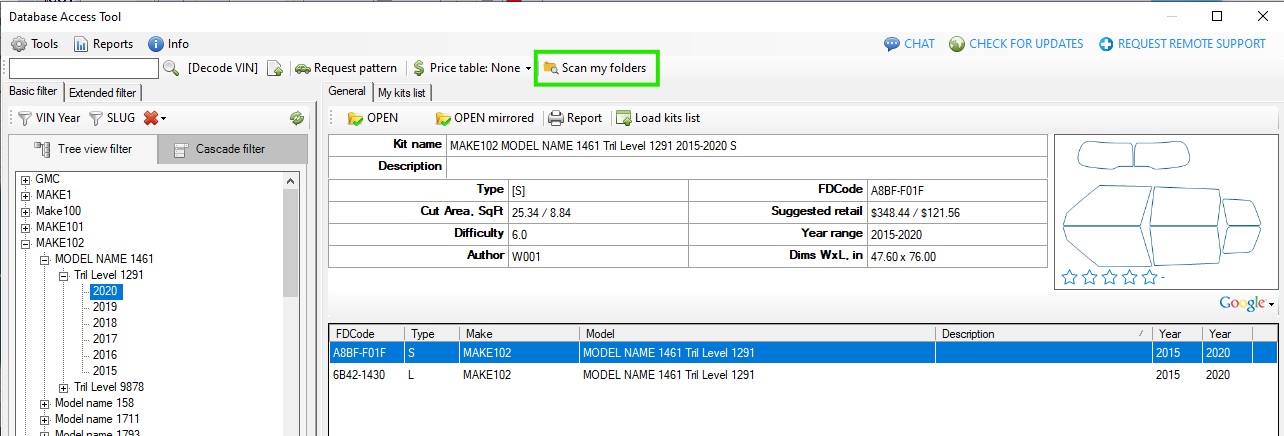
In the future, you do not need to open Patterns Organizer every time you want to scan your custom pattern folders.
From the main Database Access Tool window, click “Scan my folders” to perform the same scan.
View Your Custom Patterns
After the folder has been scanned, your custom patterns will appear under the My Patterns tab in Patterns Organizer.

Return to the Database Access Tool and click the Refresh button.
Your custom patterns will now be highlighted using the color you assigned to the USER author, making them easier to locate in the Tree View.